Do You Know How to Setup an Email Alias on Your G Suite Email?
How to Setup an Email Alias on Your G Suite Email
An email alias is basically an alternative email address (whether already assigned to a mailbox or not) that you can use to send out or reply to emails via your mail mailbox. Last time, I talked about how to configure catch-all routing on G Suite Today, I will talk about setting up an email alias on your G Suite email so that you can send out, or reply to routed, emails as the address they were sent to.
For instance, if catch-all routing allows you to receive emails sent to unassigned addresses on your domain, an email alias allows you to reply to the received emails using the same email address they were sent to, in spite of the fact that the email address doesn’t actually exist.
HERE IS HOW TO CONFIGURE AN EMAIL ALIAS ON G SUITE EMAIL
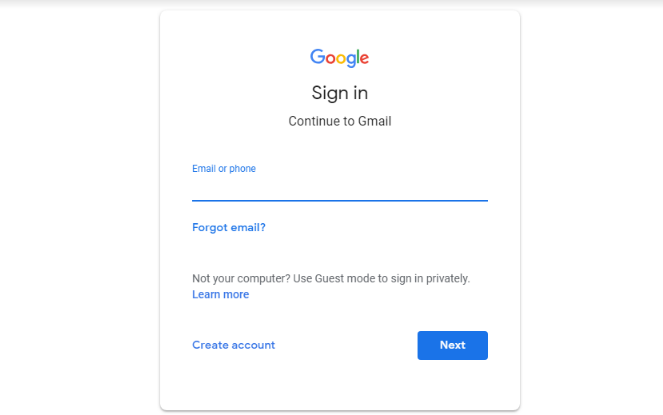
- Go to mail.google.com and login
- On the top right corner, click the gear icon and then “settings”.

- On the next page, click “Accounts”. Scroll down a bit and Click “add an email address”

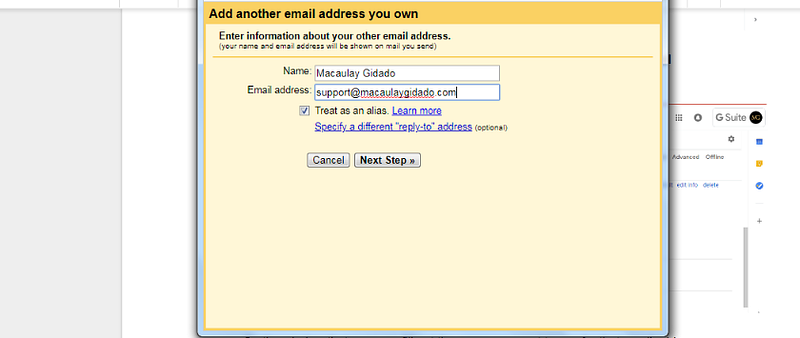
- On the window that pops up, fill out the name you want to use for that email address. Could be your name. It could be “Support”. Could also be “Customer Care”. It’s up to you. Type in the email address you want to create. This could be anything@yourdomain.com.
- Make sure that the box for “Treat as an alias” is checked. Then click the “Next Step” button under.
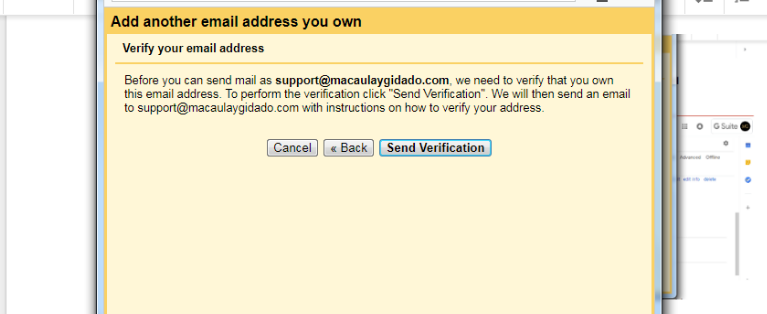
- Google will send a verification code to the email address you added above.
- If this doesn’t happen automatically, click “send verification” on the window that appears.
- This is where it gets tricky. If the email address you added above is an existing one, then check the mailbox for that email address to find the verification code. If the email address doesn’t exist, then make sure you have set up catch-all routing on your G Suite account so that the verification email can be routed to your catch-all mailbox. Otherwise, you will not receive the verification code.
- Next, Log into your mailbox on another window or tab.
- Open the email by Google and retrieve the code. Or just click the verification link in the email.

- If you prefer to verify using the confirmation code, then go back to the previous window, paste the code, and click “verify”.
- You will be returned to settings.
- Then look for where it says “When replying to a message”. Under it, check the box for “Reply from the same address the message was sent to”

That’s it. Time to test everything to make sure it works.
- Have someone send an email to your alias. If you have catch-all routing on, you will get the email.
- Now reply to that email and check with the receiver to make sure that they are seeing your alias and not your main email address as the sender.
You can repeat this whole process again and again, depending on the number of email addresses you want to add as a alias. I think there’s a limit though — 30 aliases to be precise.
An email alias is basically an alternative email address (whether already assigned to a mailbox or not) that you can use to send out or reply to emails via your mail mailbox. Last time, I talked about how to configure catch-all routing on G Suite Today, I will talk about setting up an email alias on your G Suite email so that you can send out, or reply to routed, emails as the address they were sent to.
For instance, if catch-all routing allows you to receive emails sent to unassigned addresses on your domain, an email alias allows you to reply to the received emails using the same email address they were sent to, in spite of the fact that the email address doesn’t actually exist.
HERE IS HOW TO CONFIGURE AN EMAIL ALIAS ON G SUITE EMAIL
- Go to mail.google.com and login
- On the top right corner, click the gear icon and then “settings”.

- On the next page, click “Accounts”. Scroll down a bit and Click “add an email address”

- On the window that pops up, fill out the name you want to use for that email address. Could be your name. It could be “Support”. Could also be “Customer Care”. It’s up to you. Type in the email address you want to create. This could be anything@yourdomain.com.
- Make sure that the box for “Treat as an alias” is checked. Then click the “Next Step” button under.
- Google will send a verification code to the email address you added above.
- If this doesn’t happen automatically, click “send verification” on the window that appears.
- This is where it gets tricky. If the email address you added above is an existing one, then check the mailbox for that email address to find the verification code. If the email address doesn’t exist, then make sure you have set up catch-all routing on your G Suite account so that the verification email can be routed to your catch-all mailbox. Otherwise, you will not receive the verification code.
- Next, Log into your mailbox on another window or tab.
- Open the email by Google and retrieve the code. Or just click the verification link in the email.

- If you prefer to verify using the confirmation code, then go back to the previous window, paste the code, and click “verify”.
- You will be returned to settings.
- Then look for where it says “When replying to a message”. Under it, check the box for “Reply from the same address the message was sent to”

That’s it. Time to test everything to make sure it works.
- Have someone send an email to your alias. If you have catch-all routing on, you will get the email.
- Now reply to that email and check with the receiver to make sure that they are seeing your alias and not your main email address as the sender.
You can repeat this whole process again and again, depending on the number of email addresses you want to add as a alias. I think there’s a limit though — 30 aliases to be precise.


